This article was initially just about declaring dialogs as part of your app routes using go_router in Flutter. It expanded to explain certain concepts that I thought were interesting sharing like Routes and Pages, If you're in a rush (we all have deadlines) feel free to skip to the TLDR.
While seeing a talk by Cagatay Ulusoy about Navigator 2.0 he had routes (in the URL) that were dialogs and realized that if that was possible using Navigator 2.0 directly then it should be possible using go_router too. And, it is, but not out of the box.
The goal
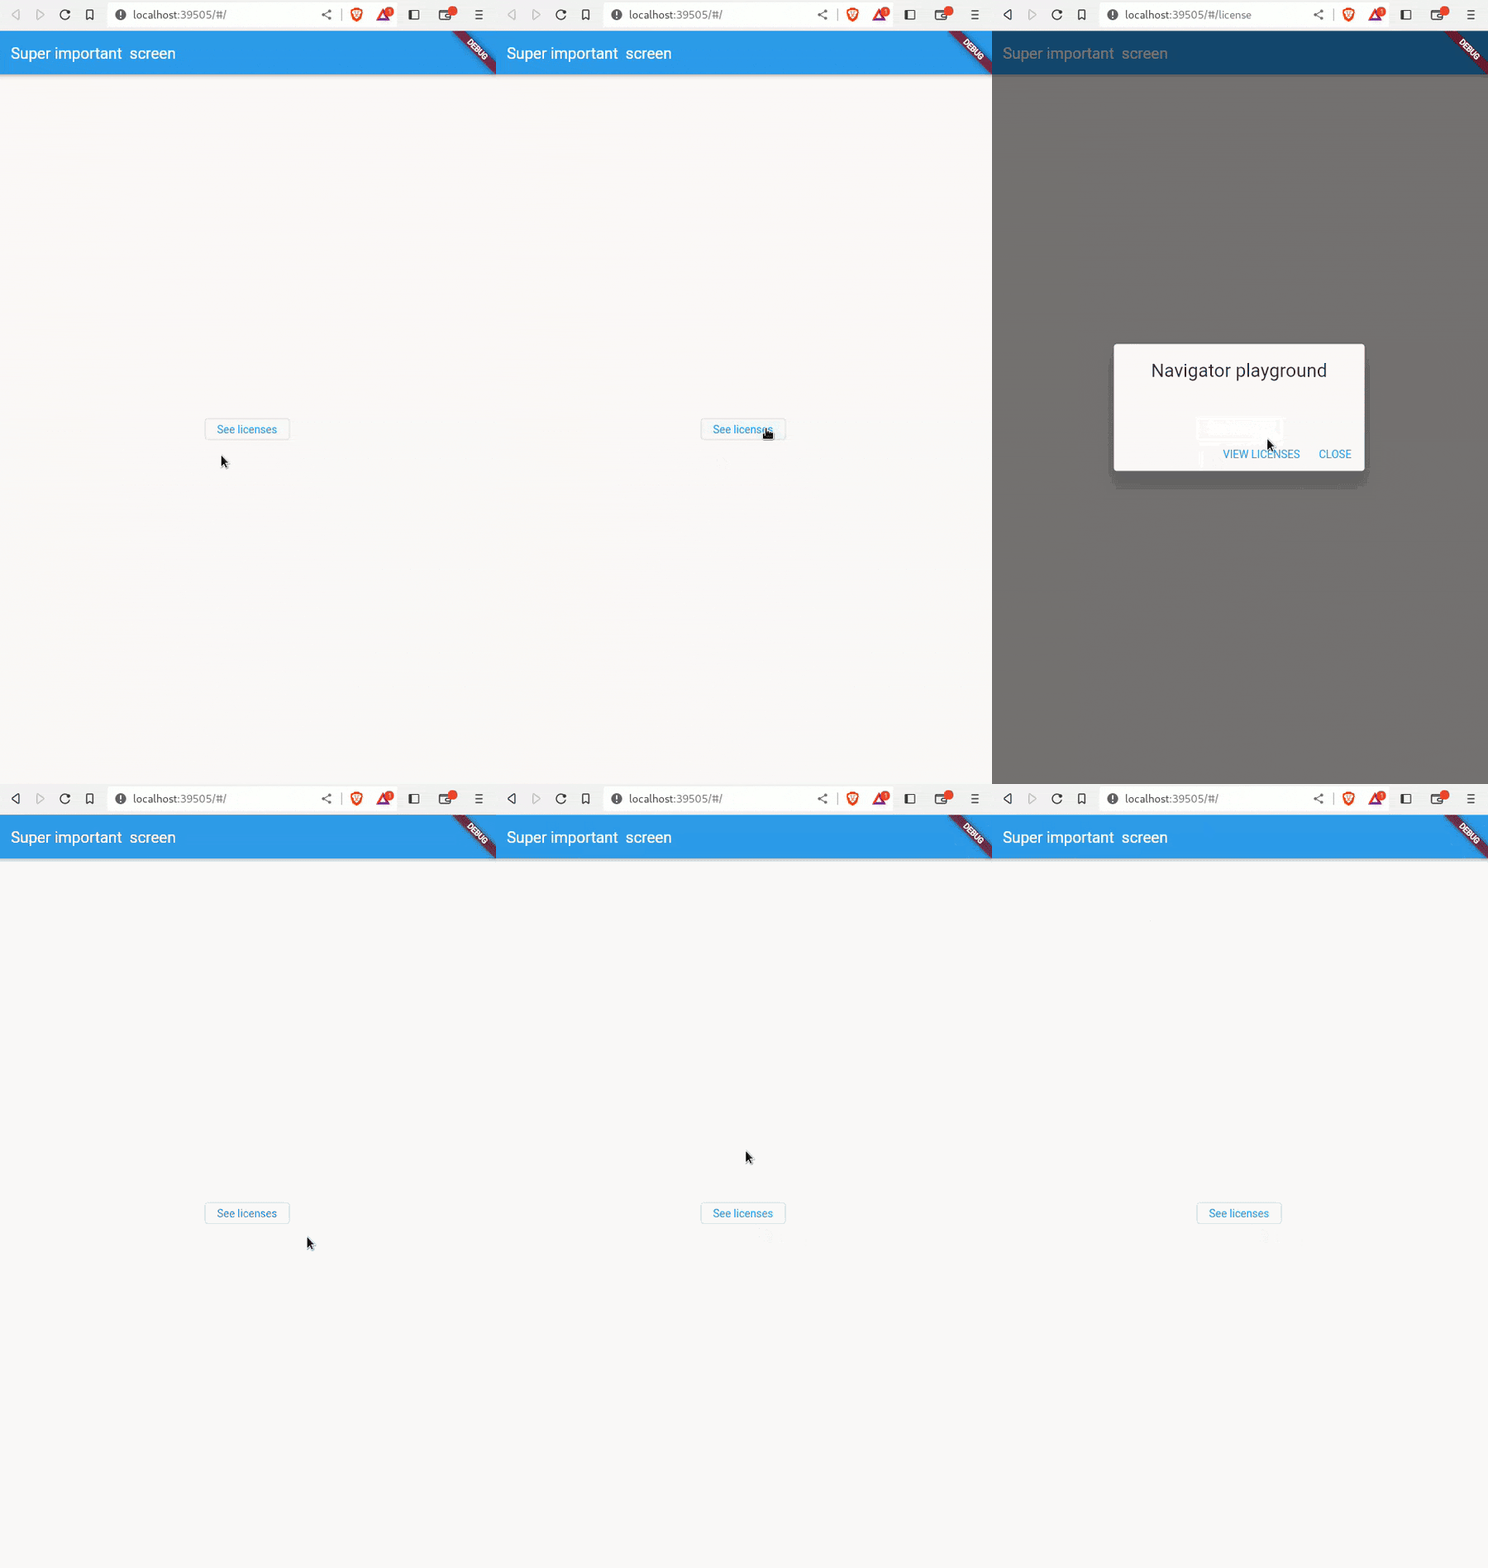
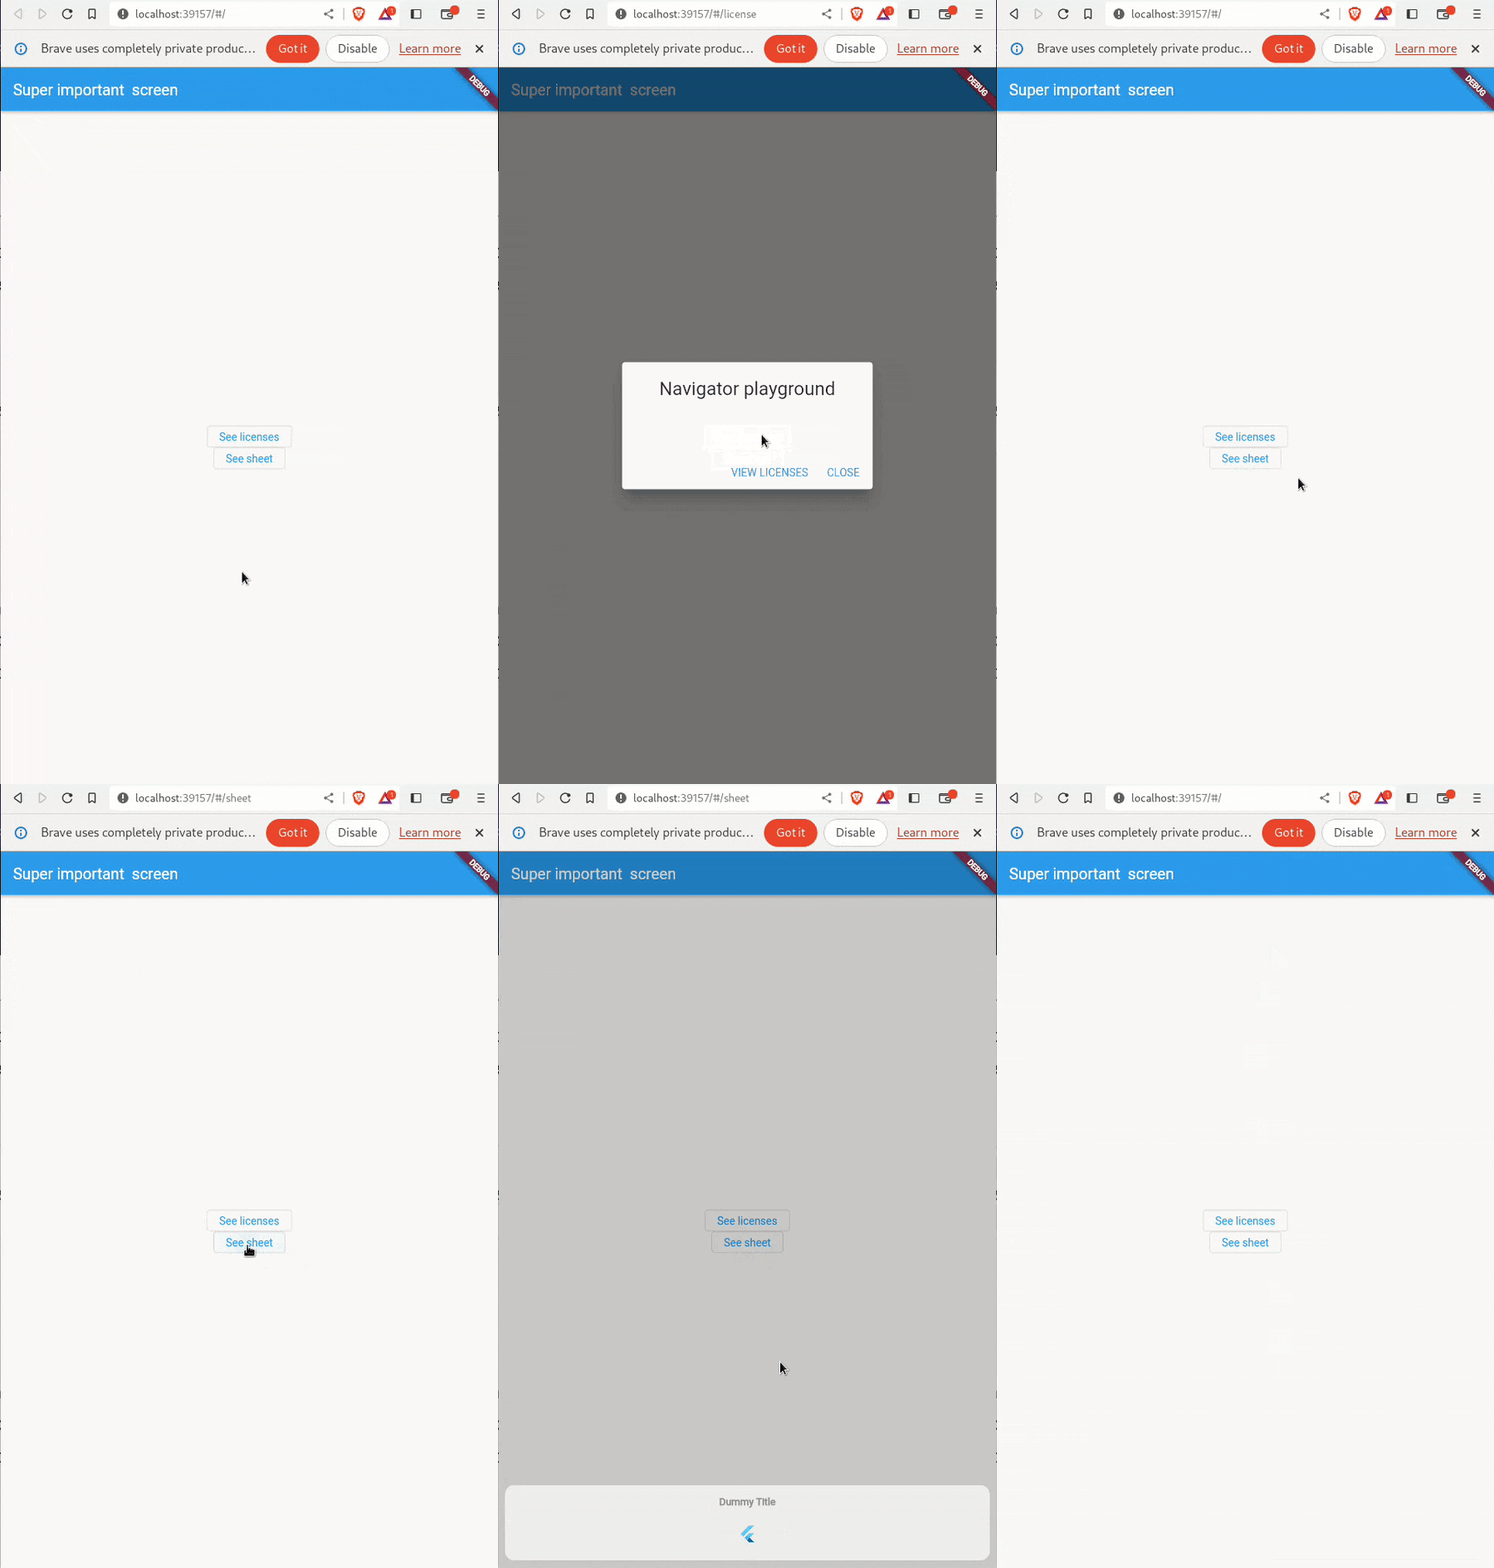
First things first, let me clarify what it is that I'm trying to achieve, notice how displaying a dialog updates the app URL. This way we could deep link into a dialog which is not the default behavior you get in Flutter :
Why would we want persistent modal pages
So our objective is to achieve the above and to be able to display the dialog when the app is opened directly via URL. This example might seem trivial, but a dialog (or any other modal) could be an important part of a navigation flow and in some circumstances, it makes sense to be able to access it via URL.
When should we avoid them
Having said that there are many cases (most I would argue) in which that is not a good idea, a dialog that confirms the exit of a page, that a form will be cleared or a network error does not make sense to declare as part of your routes. So give it some thought before implementing the last shiny thing you find on the internet. Most often than not an imperative call to showDialog will more than suffice.
You can check out the starter project if you want to follow along. If you're new to navigation in Flutter take a look around flutter.dev documentation
Migrating the starter app to GoRouter
The first step is adding go_router to our starter app via flutter pub add go_router
Then we can model our app's routes, we want:
1. Home page that displays a button. We want to associate this route with '/'.
2. License dialog we would like to access via '/licenses'
We can declare our new GoRouter like :
final GoRouter _router = GoRouter(
  routes: <RouteBase>[
    GoRoute(
      path: '/',
      builder: (context, state) => MyHomePage(),
      routes: <RouteBase>[
        GoRoute(
          path: 'license',
          builder: (context, state) {
            return AboutDialog();
          },
        ),
      ],
    ),
  ],
);
And update our MaterialApp to a MaterialApp.router :
 class MyApp extends StatelessWidget {
  const MyApp({super.key});
  @override
  Widget build(BuildContext context) {
    return MaterialApp.router(
      routerConfig: _router,
      title: 'Navigator playground',
    );
  }
}

class MyHomePage extends StatelessWidget {
  const MyHomePage({super.key});

  @override
  Widget build(BuildContext context) {
    return Scaffold(
      appBar: AppBar(title: const Text('Super important  screen')),
      body: Center(
        child: OutlinedButton(
          onPressed: () => context.go('/license'),
          child: const Text("See licenses"),
        ),
      ),
    );
  }
}
And that's it, we have migrated our complicated app to use go_router, but it does not behave exactly as we could expect. We naively tried to pass a Dialog within the builder above only to find a Black screen behind our dialog.
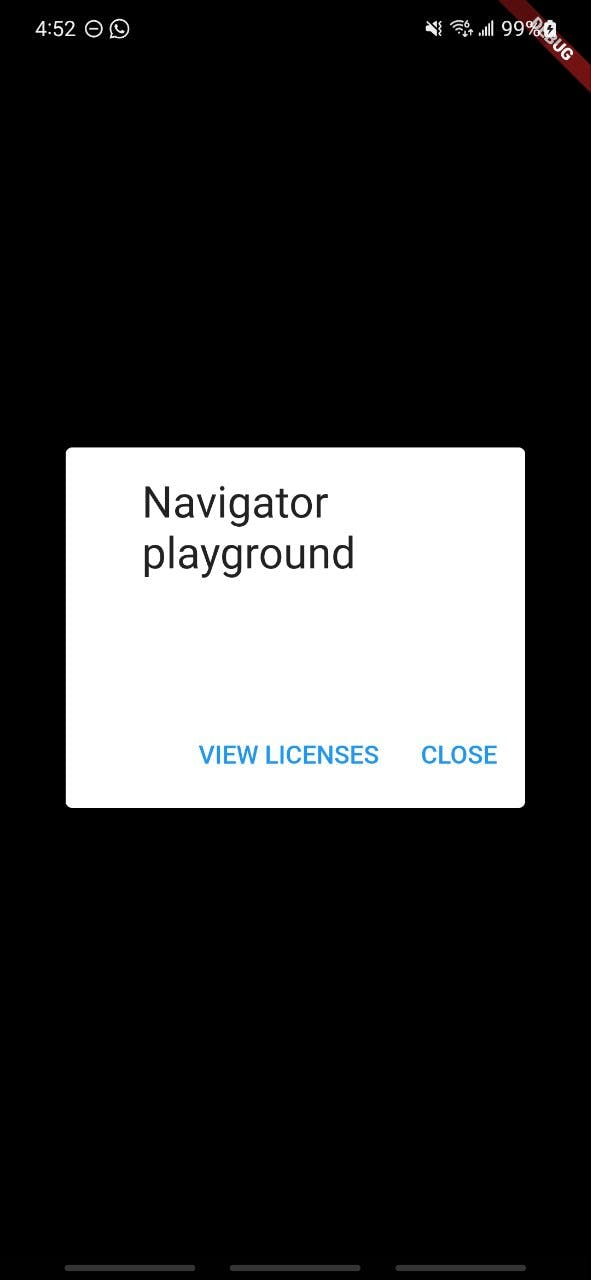
That's to be expected as by default the builder wraps the widget inside a MaterialPage and that is not what we want.
So, how does Flutter display our previous dialog, and how can we leverage that. We dig a little deeper into Flutter's showDialog Function which is what we used initially, and we can find that it just calls Navigator.of(context, rootNavigator: useRootNavigator).push<T>(DialogRoute<T>( .
A DialogRoute, interesting huh? Where does this DialogRoute comes from and which other routes does Flutter provide? Can we take advantage of this DialogRoute?
Routes and Pages
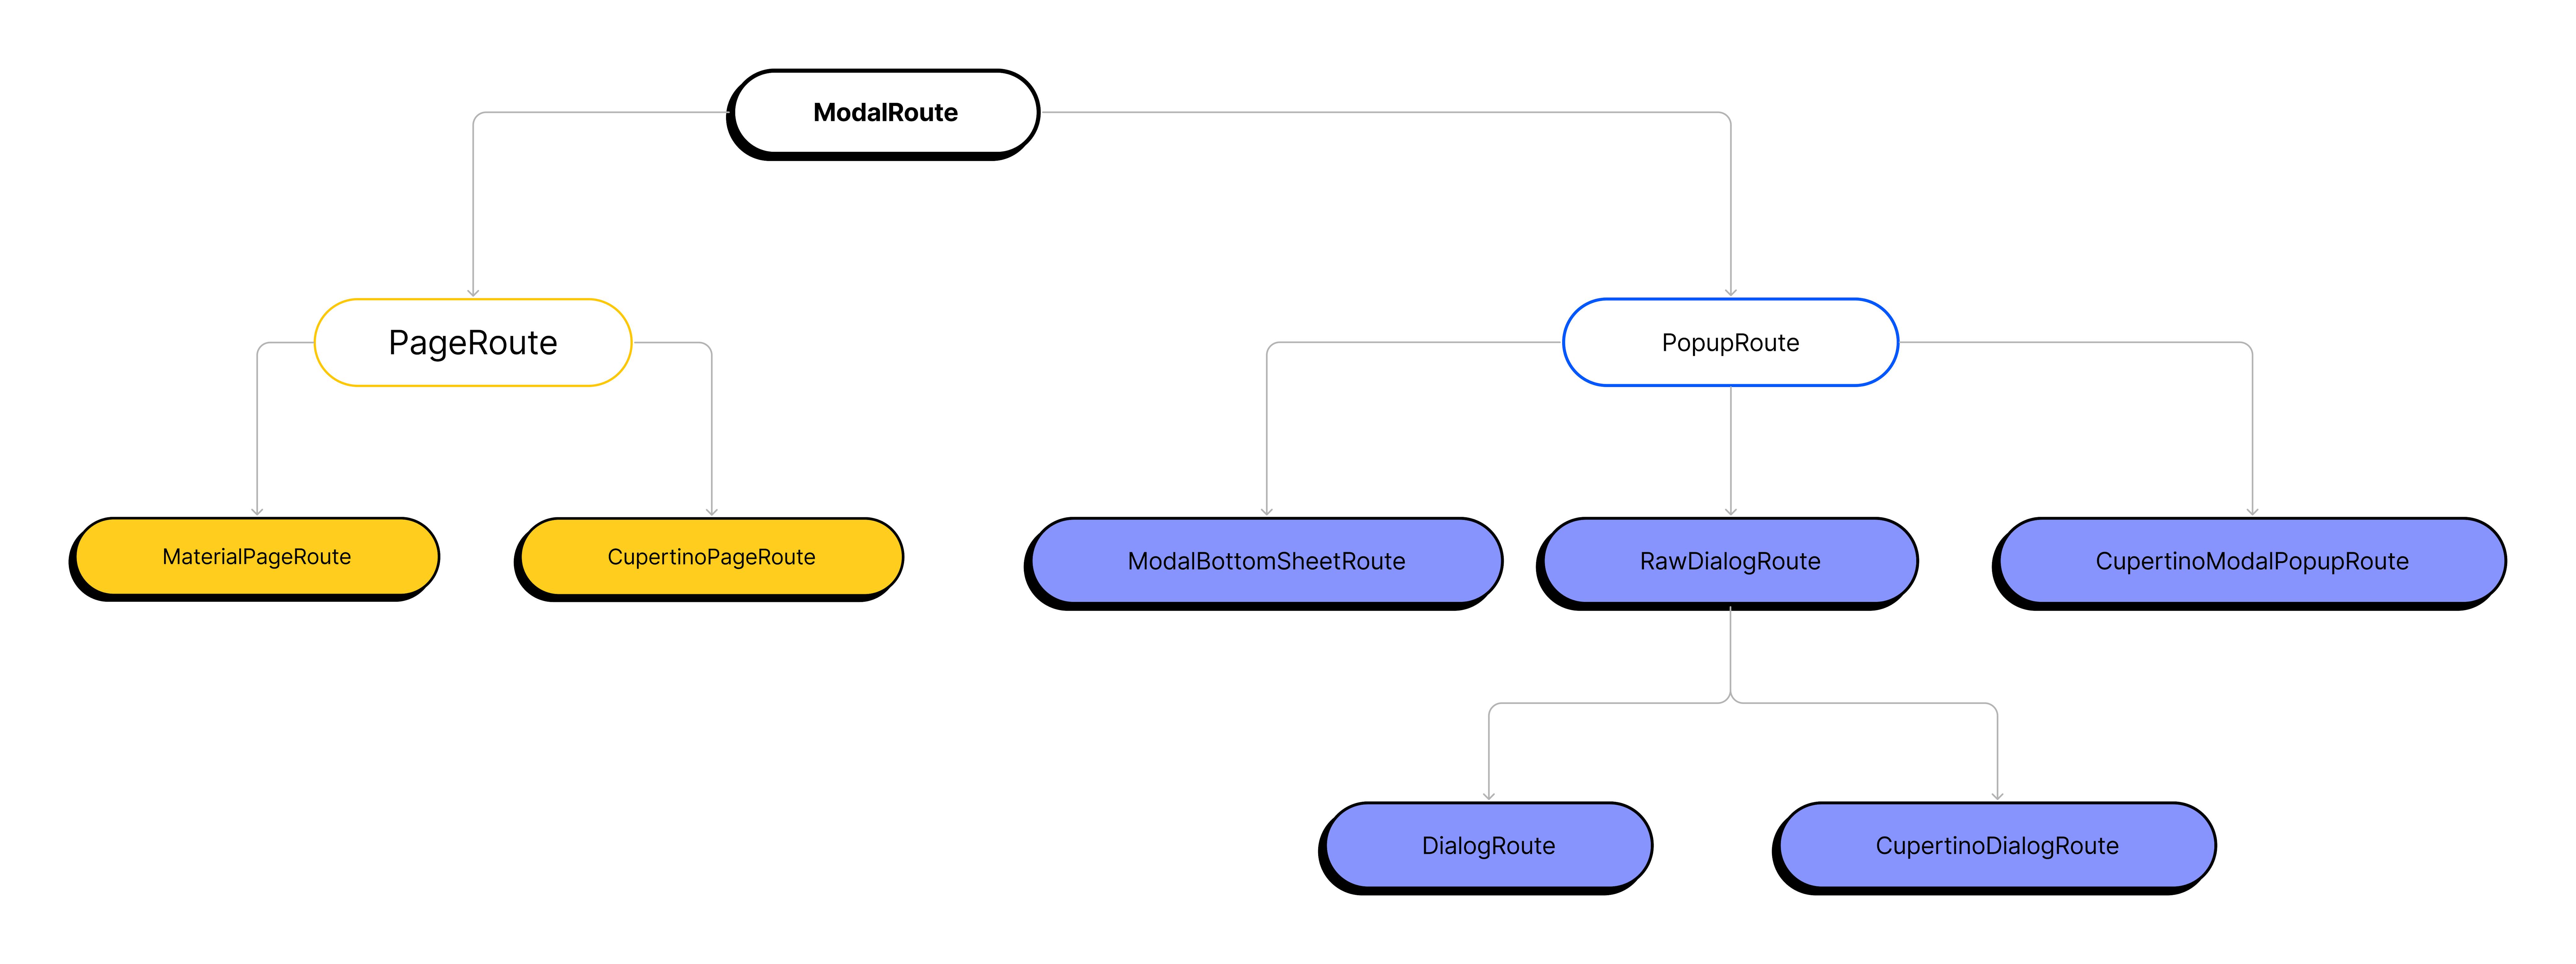
Up until Navigator 1.0 Flutter used Routes for pushing pages to the Navigator, we had PageRoutes like MaterialPageRoute and CupertinoPageRoute (in yellow) that take up the entire screen; and PopupRoute and its derivatives for dialogs, bottomsheets and other modal widgets (in blue).
So can we just use DialogRoute and call it a day?
Not quite, GoRouter declares a list of Page's instead of Route's to declare its... routes; and they are not interchangeable.
Fortunately, Flutter ships with MaterialPage and CupertinoPage in the SDK and go_router provides us with CustomTransitionPage and NoTransitionPage if we want to customize the transitions of our pages. But all of them target full-screen pages, which is not what we are looking for, so what about all the PopupRoute's.
TLDR, the solution
There is a way to bridge the gap between a Route and a Page, we just extend the Page. The same way Flutter implements MaterialPage from MaterialPageRoute our target in this case will be the DialogRoute.
/// A dialog page with Material entrance and exit animations, modal barrier color,
/// and modal barrier behavior (dialog is dismissible with a tap on the barrier).
class DialogPage<T> extends Page<T> {
  final Offset? anchorPoint;
  final Color? barrierColor;
  final bool barrierDismissible;
  final String? barrierLabel;
  final bool useSafeArea;
  final CapturedThemes? themes;
  final WidgetBuilder builder;

  const DialogPage({
    required this.builder,
    this.anchorPoint,
    this.barrierColor = Colors.black54,
    this.barrierDismissible = true,
    this.barrierLabel,
    this.useSafeArea = true,
    this.themes,
    super.key,
    super.name,
    super.arguments,
    super.restorationId,
  });

  @override
  Route<T> createRoute(BuildContext context) => DialogRoute<T>(
      context: context,
      settings: this,
      builder: builder,
      anchorPoint: anchorPoint,
      barrierColor: barrierColor,
      barrierDismissible: barrierDismissible,
      barrierLabel: barrierLabel,
      useSafeArea: useSafeArea,
      themes: themes);
}
By just extending Page and implementing its createRoute method we can fulfill the Page contract which in this case is nothing more than an adapter of DialogRoute.
Let's now update our code and test if we get the desired behavior :
final GoRouter _router = GoRouter(
  routes: <RouteBase>[
    GoRoute(
      path: '/',
      builder: (context, state) => MyHomePage(),
      routes: [
        GoRoute(
          path: 'license',
          pageBuilder: (BuildContext context, GoRouterState state) {
            return DialogPage(builder: (_) => AboutDialog());
          },
        ),
      ],
    ),
  ],
);
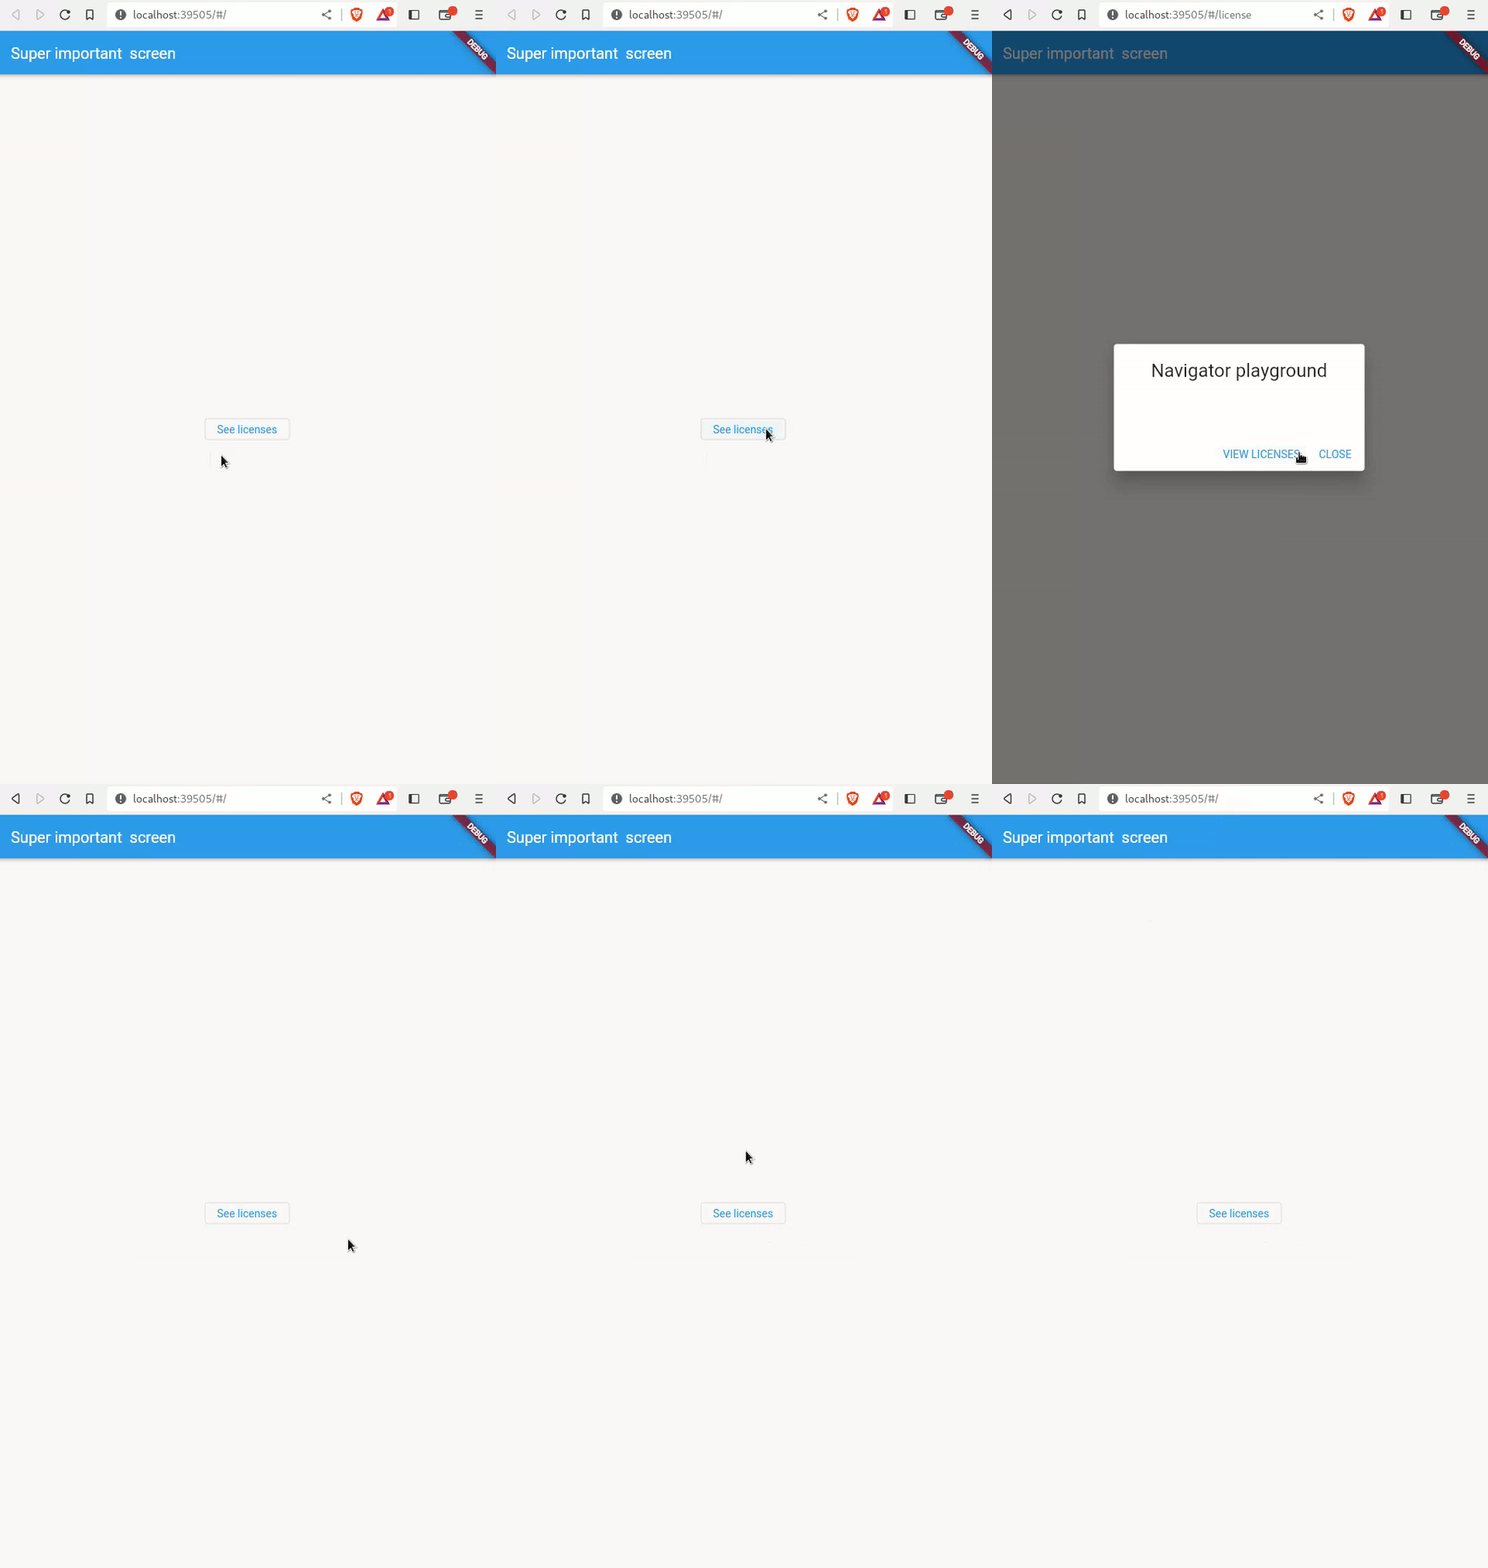
And it works as intended, see how the URL changes when we open the dialog, and if we visit the /license URL directly it will show the app with the dialog open :
Where to go from here
We're done, well at least we found a solution to our original problem, we are now able to declare dialog routes as part of our URL but what about all other modals:

We only covered DialogRoute which is used by showDialog which was in our original code, but what about all the rest?
Extra: CupertinoModalPopupRoute
The process is pretty straightforward and repeatable if you need to use other routes within GoRouter like CupertinoModalPopupRoute or even a custom one you create, just create a new class extending Page :
class CupertinoModalPopupPage<T> extends Page<T> {
  final Offset? anchorPoint;
  final Color? barrierColor;
  final bool barrierDismissible;
  final String barrierLabel;
  final bool semanticsDismissible;
  final WidgetBuilder builder;
  final ImageFilter? filter;

  const CupertinoModalPopupPage(
      {required this.builder,
      this.anchorPoint,
      this.barrierColor = kCupertinoModalBarrierColor,
      this.barrierDismissible = true,
      this.barrierLabel = "Dismiss",
      this.semanticsDismissible = true,
      this.filter,
      super.key});

  @override
  Route<T> createRoute(BuildContext context) => CupertinoModalPopupRoute<T>(
      builder: builder,
      barrierDismissible: barrierDismissible,
      anchorPoint: anchorPoint,
      barrierLabel: barrierLabel,
      barrierColor: barrierColor,
      filter: filter,
      semanticsDismissible: semanticsDismissible,
      settings: this);
}
And as easily as that we have adapted another PopupRoute to a Page.
Note how we pass to the
settingsparameter a reference to the current class (viathis), we do that so that the Navigator can identify the class as a Page, which it does via the settings argument.So remember if you find a Route that accepts settings as a parameter pass
this
The end
That is all, congratulations if you made it this far, I hope this article was helpful, feel free to write a comment if you have any doubts or want to discuss beyond what this article covers. Also if you got lost at any point you can check the finished project at this repo.
Happy hacking!